Over the air updates with ESP8266 (nodemcu) boards
In this tutorial we will see the demonstration of OTA updates using the Device Security Booster and nodemcu board based on the ESP8266 chipset.
Requirements
nodemcu esp8266 board
Micro USB cable
Device Security Booster subscription
PlatformIO VScode extension
Getting started
To get started head to asvin’s Github repository and clone it. The code is writen under PlatformIO. Import the project using VScode’s PlatformIO extenstion.
To proceed further you will need to edit few of the parameters in the code.
Open the main.cpp file in the editor and add credentials for your device
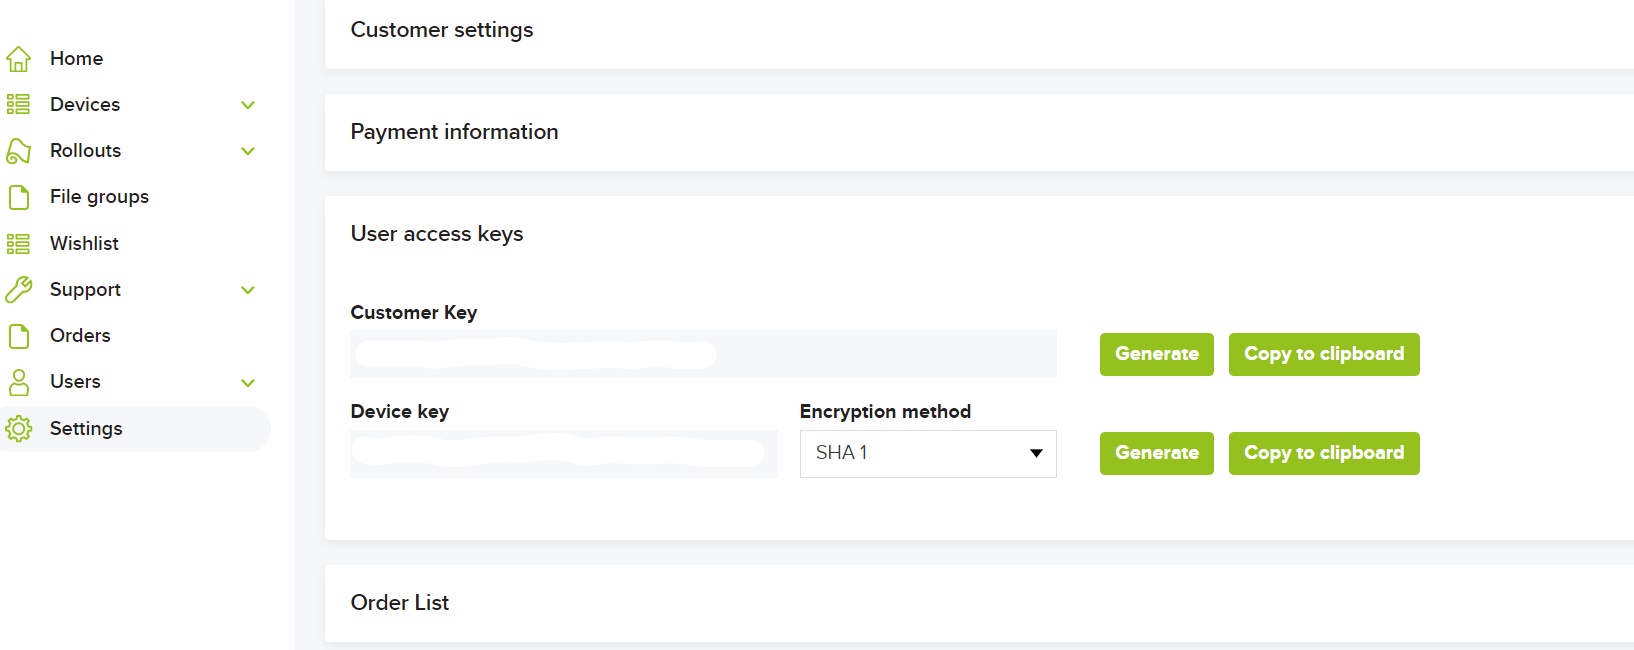
Device & Customer keys: This will be found on the platform under the settings tab. These keys will be used to generate an auth token.
After this step build the code for arduino or platformIO and upload to on the ESP8266 board
This sketch uses the popular WifiManager library to manage WiFi credentials. Upon booting the ESP8266 will start a WiFi hotspot with the name “AutoConectAP”. The user should connect to it with cellphone/laptop and enter in their credentials. These credentials will be stored in the ESP flash memory and will be stored as the default. These credentials can be changed later on.
Setting up OTA
The Device Security Booster provides secure OTA updates for IoT devices. Lets see how we can setup OTA updates
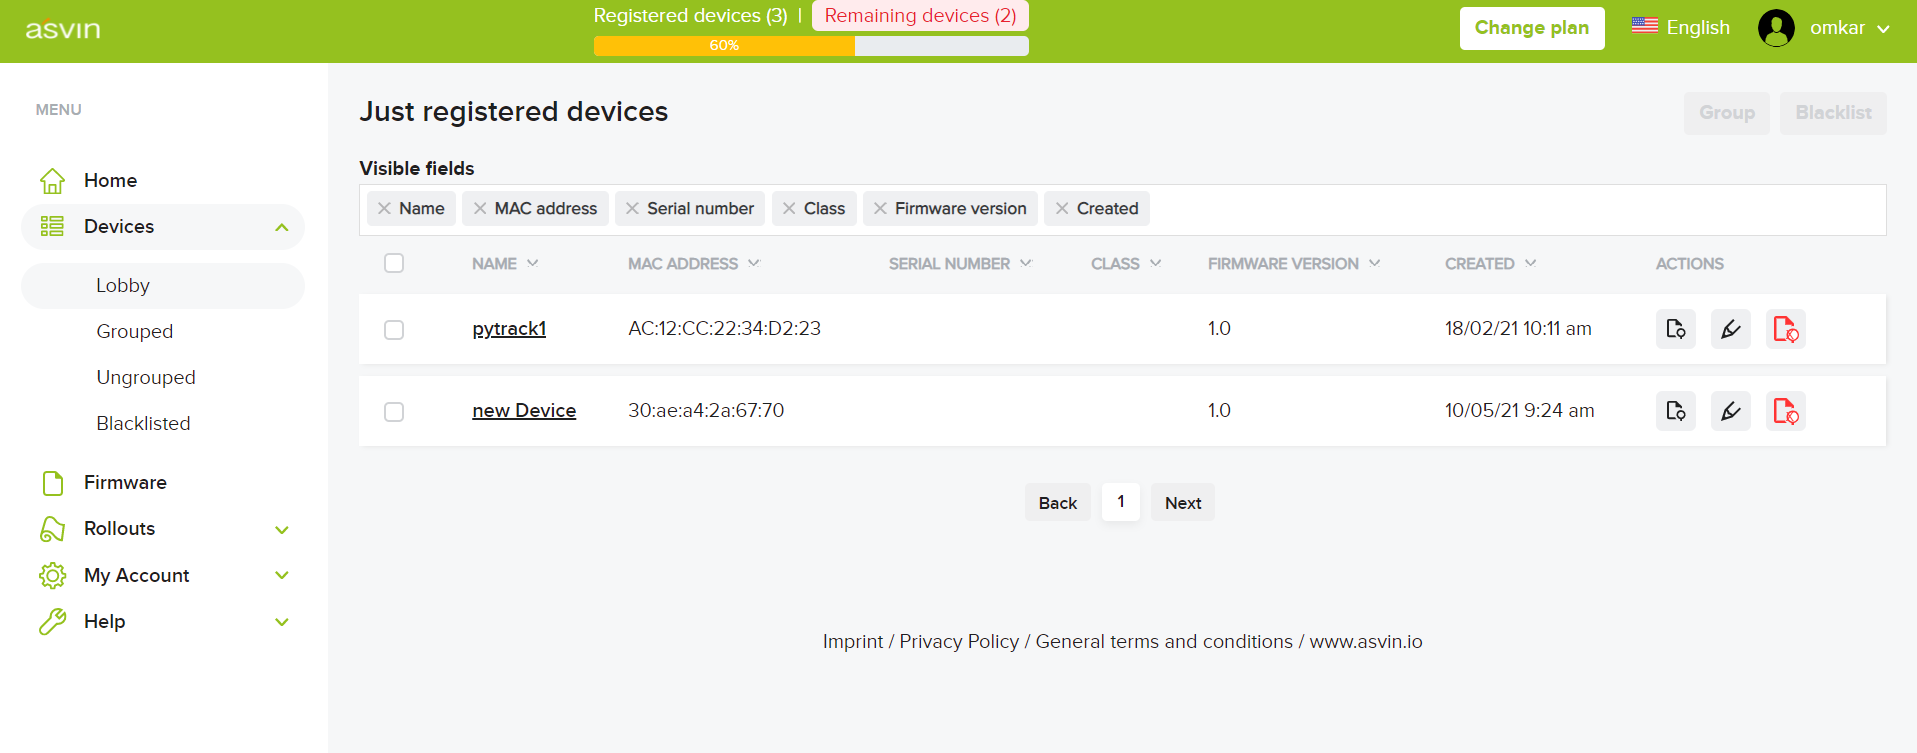
Register Device: When you start and upload your sketch on the ESP8266 board, the board will start executing and calling the defined API routes. The first API it calls is Register Device, After this API is successfully called, you will see your device appear under the “Just Registered Devices” section of the platform under devices.
Device Groups: Device Security Booster provides updates for a group of devices. Let us create a group called OTA test. We can add our ESP device to this group . Under Devices > Device groups click on “New Device Group”. After this navigate back to the “Just Registered” Devices, click Device Grouping and add the device to the newly created device group.
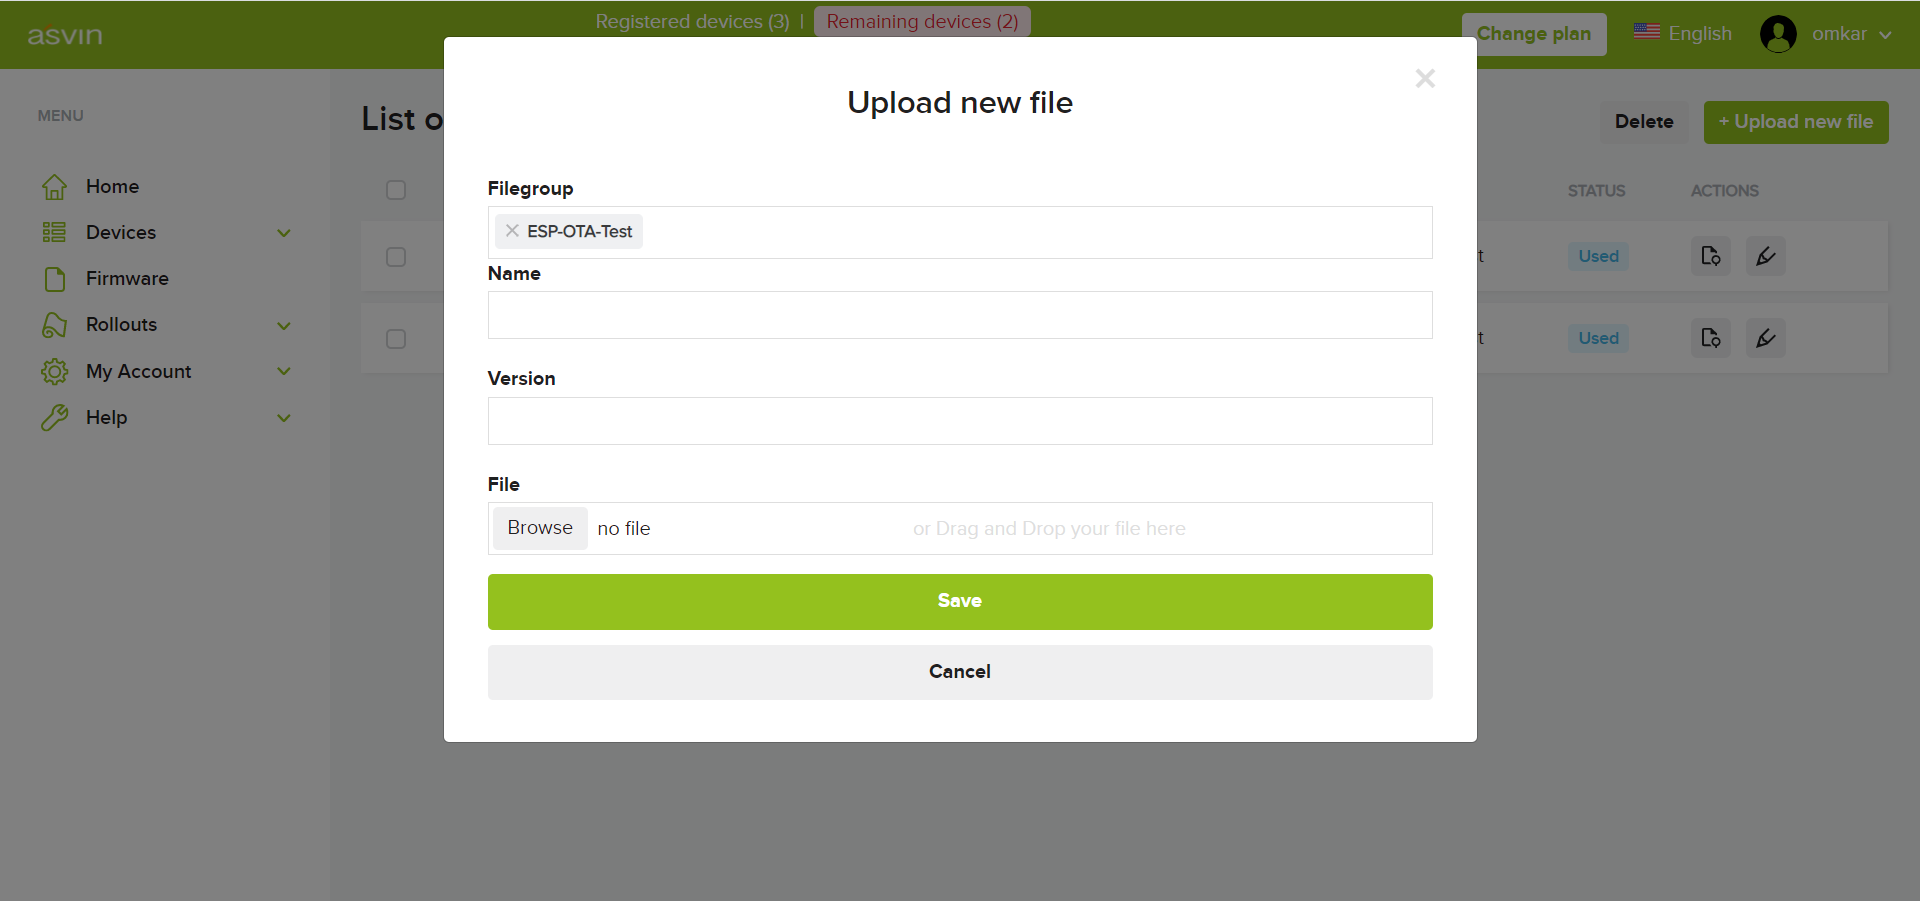
File Groups: Once our device is assigned to a file group. Let’s upload a file we want to provide as an OTA update. Usually this is <file_name>.bin. Let us upload esp-ota-blink.bin file to the filegroup ESP_OTA_Test
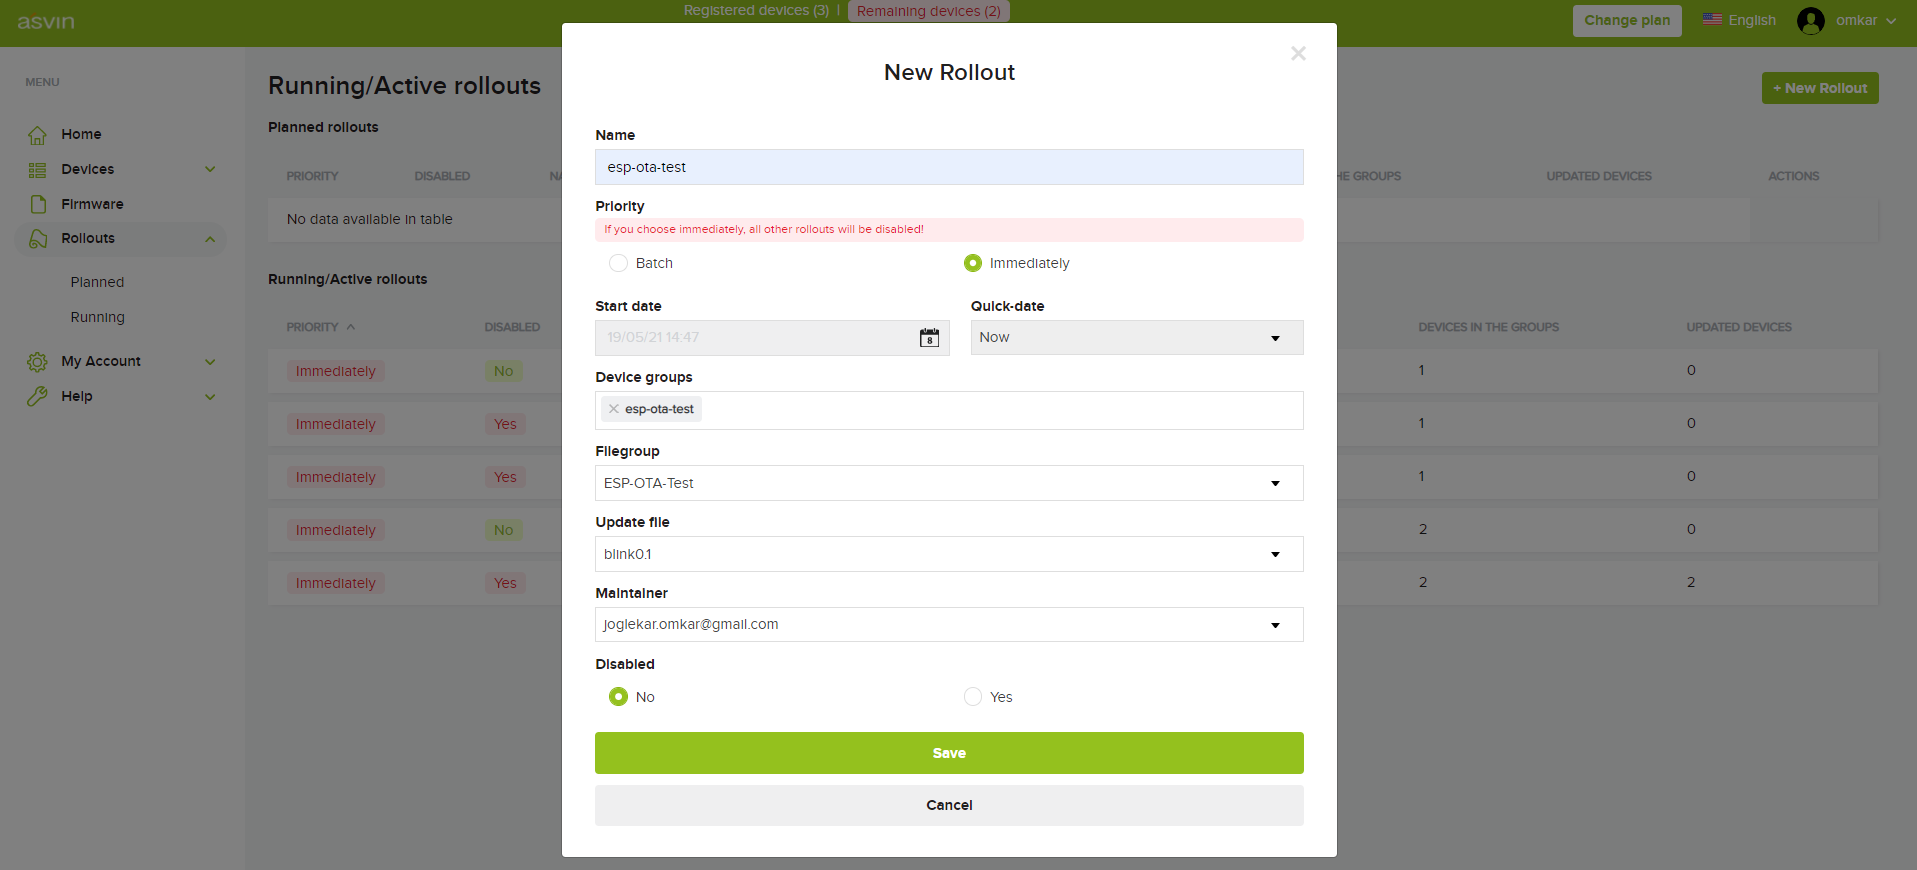
Rollout: In this step we will setup a rollout to deliver OTA an update of the file specified above to our ESP8266 device. In the rollout section let’s start by creating a rollout. Fill in the options as shown in the screenshot. Choose either batch or immediate update. There is an option to choose a time or to do an update immediately. Select the file to be rolled out as an update and click Save.
The rollout is now enabled. Next time our device queries the Next Rollout API, the rollout will be available and further API’s will be called inside the ESP device. The ESP device will update itself after this with the file we uploaded earlier. In this case we will see the LED blinking on our ESP board
Once the rollout is completed the new file will be running on the board. In this case we rolled out a Blink LED file. The board will call the Rollout Success API, which is the part of the esp-ota-blink.bin file that we uploaded earlier.
The change in the firmware version of the device is also updated on the Device Security Booster .
Thus we have sucessfully completed the OTA rollout. The Complete code and files can be found at asvin’s Github repository Github repository